Showing posts with label Dina Wakely. Show all posts

Saturday, July 15, 2017

Fantastic Fabric ATCs

This month for the ATC swap over at Stampotique we tried to come up with something a little bit different. So, I asked my husband to give me ideas. He said, "What about fabric?" Still high off my banner for the blog hop I said, "Yes! That is perfect!" So back to my scrap fabric stash I went.

I recently ordered a few new stamps from Stampotique and this puppy was needing to be on this ATC....and...given his position....I thought the, "pull my finger" stamp was just about perfect.

The only paper used on this ATC was for the back (stampted ATC back) and the dog and sentiment. The rest is fabric, interfacing, thread and twine. Oh, and a bit of acrylic paint and watercolor. I really hope that my partners enjoy these.
Additionally, it is Word Up Weekend once again over at Stampotique so..."Pull My Finger"....::snicker:: These ATCs were a blast to make so maybe in the future I will create more. Fabric is just as fun as paper, and we ALL know how I feel about paper!
Happy weekend, happy sentiments and...you know...if you gotta....pull my finger!

INGREDIENTS:
Floating Dog: Stampotique
"Pull My Finger": Stampotique
Various Joann Fabric Fabrics
Tim Holtz Twine
Color Box Ink
Faber Castell Gelatos

Wednesday, June 21, 2017

SDC 276 Stencil It!

This month Stampotique is collaborating with Eileen Hull. We were given some very wonderful die cuts to play with, not the least of which was this wonderful Passport Book cut. I admit, I was a bit perplexed at first as, I have never bound a book in my life. It was for certain a learning curve, but in the end I am pleased with the results.
I decided to create a recipe book/journal. I used one of our new release images from Daniel Torrente at Stampotique. Don't you just love this adorable stove?? It has myriad possibilities.
I used several stencils on this book and I love how each page turned out. The words were created using our Alphabet Background. I stamped the background and then cut each stamped letter out to create each word. I regret that my ink was running low, but I kind of like the distressed look.
For the first two pages I, of course, used stencils, also an envelope and more stamps. I used Tera Callihan's Cupcake Girl from Stampotique and more words from my alpha stamping. I love how the cupcake girl pops off of the stenciled background.
So for this page, of course, more stenciling as well as Stampotique's cupcake (from Terri Richardson). How much more perfect could a cupcake be for a food book? Especially one this scrumptious! See the tab here and the latch and label on the book? Those also came with the journal from Eileen.
I like how happy and cheerful the book is. .Would make me want to cook! And I am not that good of a cook, haha. Just ask my little boy! ;)

Be sure to check out the rest of the design team as well. Lots of beautiful work to be sure! Also, make sure you join our Facebook page in order to see much more inspiration as well as ATC swaps monthly! 

Ingredients:
Eileen Hull Passport Book Die Cuts
Copic Markers
Dylusions Keyholes Small Stencil
Balzar Designs Mini Numbers Stencil
Faber Castell Arrows Stencil
Heidi Swapp Triangles Stencil
Dina Wakely Acrylic Paint
Lindy's Spray Ink
Color Box Black Ink
Pom Pom Trim (target)


Saturday, June 10, 2017

Word Up Weekend!

Hello!! Its that fun time again where you learn how many amazing Stampotique sentiments there are! This project also happens to double as a texture ATC project. I love that Stampotique has ATC swaps every month.  Click the link and join! SO many talented artist participate each month! <3

So for my texture I used texture paste with a stencil (colored the paste with Lindy's) and then I used green flocking on the feathers.
I used Kassa's feather stamps in conjunction with Dina Wakely's flying bird stencil. I water-colored the feathers and then added a touch of flocking to them. Looking at them now, they also could double as ferns. I liked the words from the "barcode" stamp set (stampotique). Not sure why, but the popped out at me.
I tried to get a side view so you can see the texture. I tried to make the paste extra thick too. After not being overly inspired when I started, I really like the end result. I hope whomever I am partnered with likes them a well.
Happy weekend!!!

Ingredients:

Feather (Stampotique)
Barcode Text
Dina Wakely Birds Stencil
Color Box Black Ink
Lindy's Stamp Gang Magical Saker
Studio G Flocking
Dylusions Ink Sprays
Ranger Texture Paste
Faber Castell Gelatos

Saturday, April 29, 2017

Word Up Weeked

So, here I am again, time for Word Up Weekend and I find myself using an oldie but a goodie, once again. I really love this sentiment.

This week I decided to create and art journal style page. This week my son was so enamored with outdoor things that I was inspired to create a whimsical page for him and no sentiment but this one would do.

 I created baby wipe flowers and made a huge mess with the multi media and it was a blast!


I really tried to capture the essence of my boy blowing his dandelion puff but my printer wasn't having it so I used a marker to kind of draw your attention to what is going on in the photo. See the word "wish"? It was created using the background alpha stamp that came out this month. I stamped it out and cut out the letters from card-stock to create my own word. LOVE multi-use stamps!

I plan to find a frame and hang this one. (Maybe after getting the photo printed somewhere else...) I love how it all came together! Have a wonderful weekend and be sure to check out our facebook page for more fun word up weekend projects!

Ingredients Used:

Enjoy Today, Stampotique
Alpha Background, Stampotique
Dina Wakely Acrylic Paint
Lindy's Stamp Gang Ink Spray
Lindy's Stamp Gang Magical Shaker
Tim Holtz Rays Stencil
Dina Wakely Bird Stencil
Diane Revealy Large Triangle Stencil
Flow Magazine Paper
Ranger Texture Paste
Paper Studio Gesso
Tim Holtz Twine
Sequins
Baby Wipe Flowers
Veneers
Corrugated Cardboard

Sunday, April 2, 2017

Word Up!

Its that time again! Starting to really, really enjoy these word up weekends over at Stampotique. It gives me a chance to showcase some of our most snarky (as well as sweet) sentiments. Stampotique has quite a wide range sentiments.

This week I chose one of our new snarky sentiments from our latest sentiment cube. This particular sentiment is the partner to the saying, "Aren't you a little ray of sunshine" and takes it one step further. Love it!!

I also used this adorable Cooee, another of our newest April release. I used my gelatos to watercolor him. I really liked the way he turned out. I used stencils and paint as well as some  crackle paint to create the background for the base. Of course I used my ray stencil with the black crackle paint to create the rays of black. 
At first I was a bit unsure of the black with the orange, teal and green...I didn't want it to end up too Halloween-y but in the end, I feel like it all came together well and that the idea was put across well. 

Now, to update my eyeglasses prescription so I can sit and read for long periods of time again. 

Ingredients:

Cooee: Stampotique
Phrase Cube 2: Stampotique
Dina Wakely Acrylic Paint
Americana Acrylic Paint
Color Box Ink
Lindy's Stamp Gang Black Forest Black Magical Shaker
Faber Castell Gelato
Posca White Paint Pen
Ranger Crackle Paint
American Crafts 
Balzar Designs Number Stencil
Tim Holtz Ray Stencil
Bakers Twine
Micro Fine Glitter

Saturday, April 1, 2017

Lindy's Color Challenge For April

Good morning, all! I am so excited to finally get to share this secret! Stampotiqu and Lindy's Stamp Gang have collaborated to bring you something extra special this month! The Stampotique ladies were sent some of the most amazing mixed media products that I have gotten to play with in a very long time!!  Will you just look at this deliciousness??
Of course, the color palate we were sent was perfect for the April color challenge that Lindy's has running. I love this color combination. I would never have thought to put that green in there. Perfection!

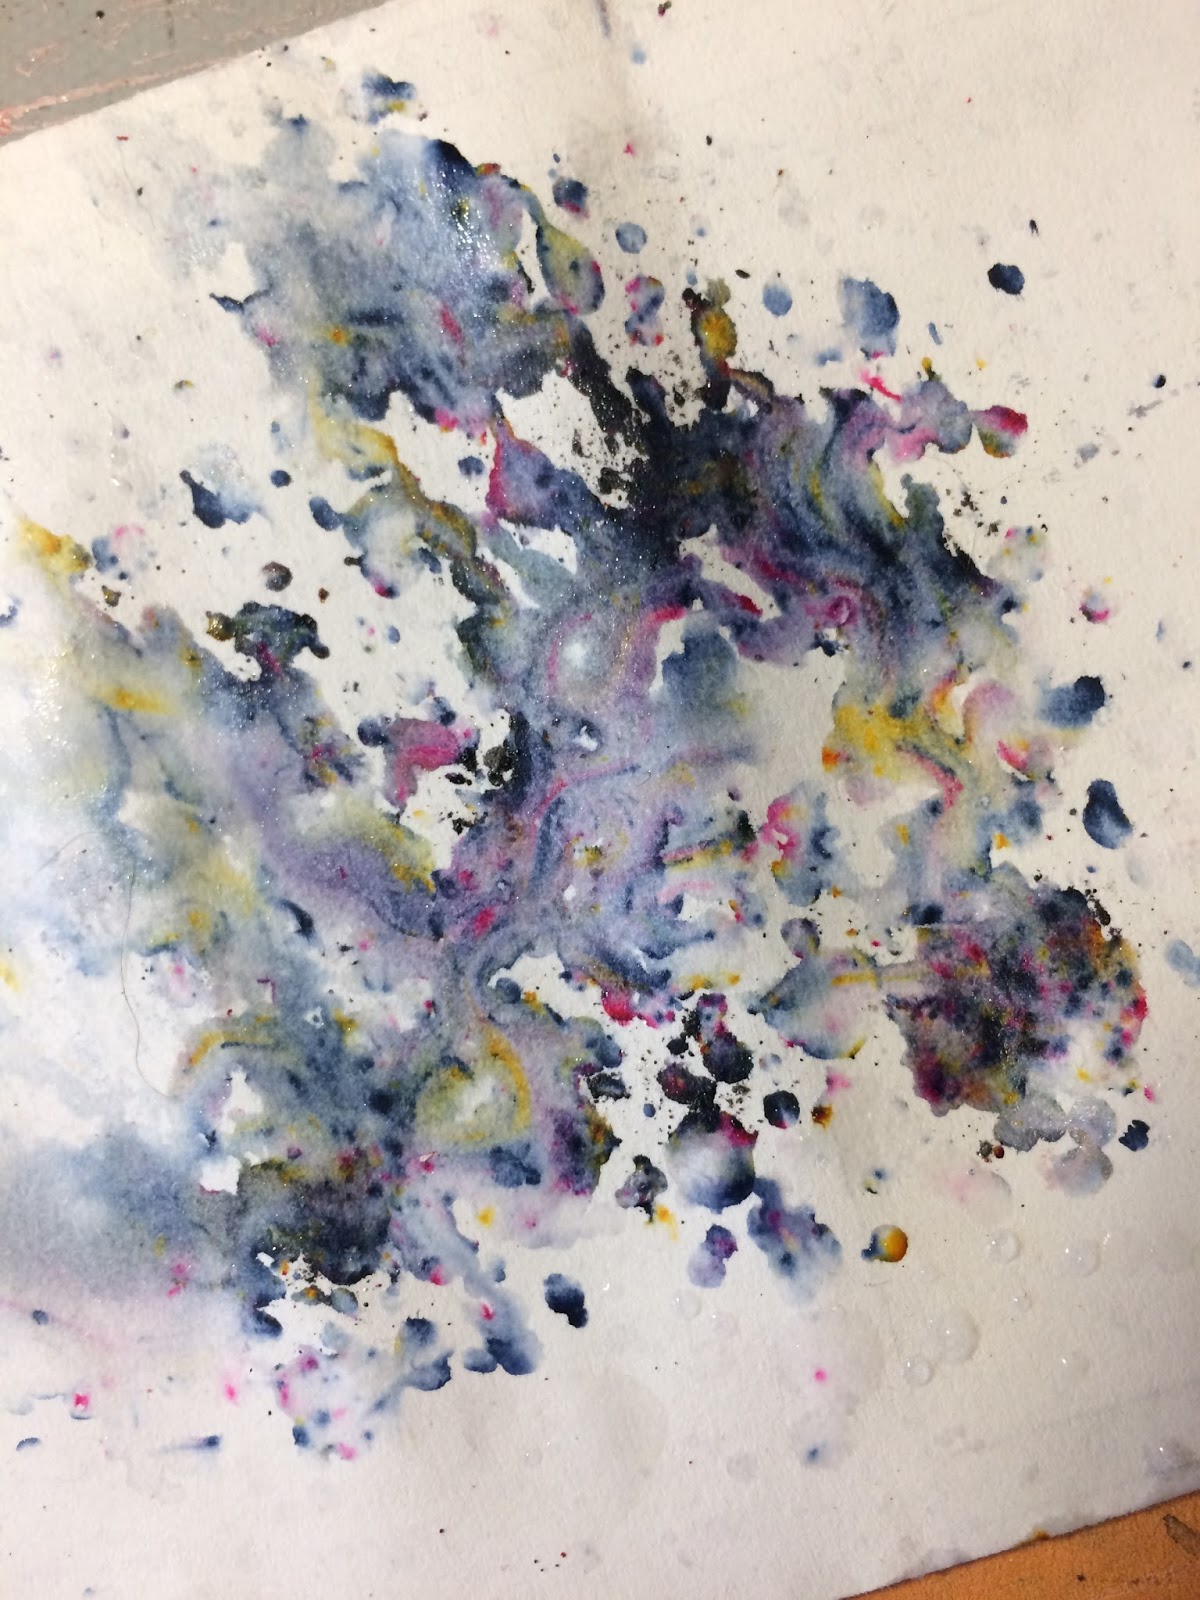
For my project I really wanted to showcase the versatility of not just Stampotique stamps, but the versatility of Lindy's products. I started with a blank chipboard frame slathered with acrylic gesso. (when in doubt, gesso!!!) I used my Flat Fabio Raspberry Lemonade. Such a gorgeous pink! Yumm-O!! I then watered it down and let it run all over, using the heat gun to move the color around. I created about 3 layers this way. 

So, my favorite product that I have tried from Lindy's has to be the magic shakers. LOOK at how many colors are magically in the Black Forest Magic Shaker, guys!!! 
 Seriously, will you just LOOK at this MAGIC up in here?? My mind almost literally exploded when I tried the Magic Shaker the first time. I already have 2 more picked out to buy you guys. Seriously...
In the end, this was my base for my frame. I love how reactive the sprays are. Just a bit of water changes everything!! SO much fun!!
Now, for the details. We were sent a little jar of Magical in Sidewalk Chalk and admittedly, at first I was unsure why we would need white....MAN was I narrow-minded. After thinking on it I experimented. A bit of Starburst Spray in Hawaiian Blue with a pinch of Magical and poof, a goreous pastel blue that I could mix into my Ranger texture paste. It....was....gorgeous!!! I used my Dina Wakely arrow stencil and that blue really popped off of the frame.

Next I decided to use the Embossing Powder we were sent (Dandelion Yellow Green).  I grabbed one of our latest release stamps from Stampotique, a scrawling script background stamp and together these are really beautiful. The only trouble is, the subtle color doesn't pick up on photo the way it does in real life so, you will just have to trust me when I tell you how beautiful it is. Subtle is good.Not to mention, I have used quite a few embossing powders in my day but this one, because of  how fine it is, has the best coverage before and after heating that I have ever used.
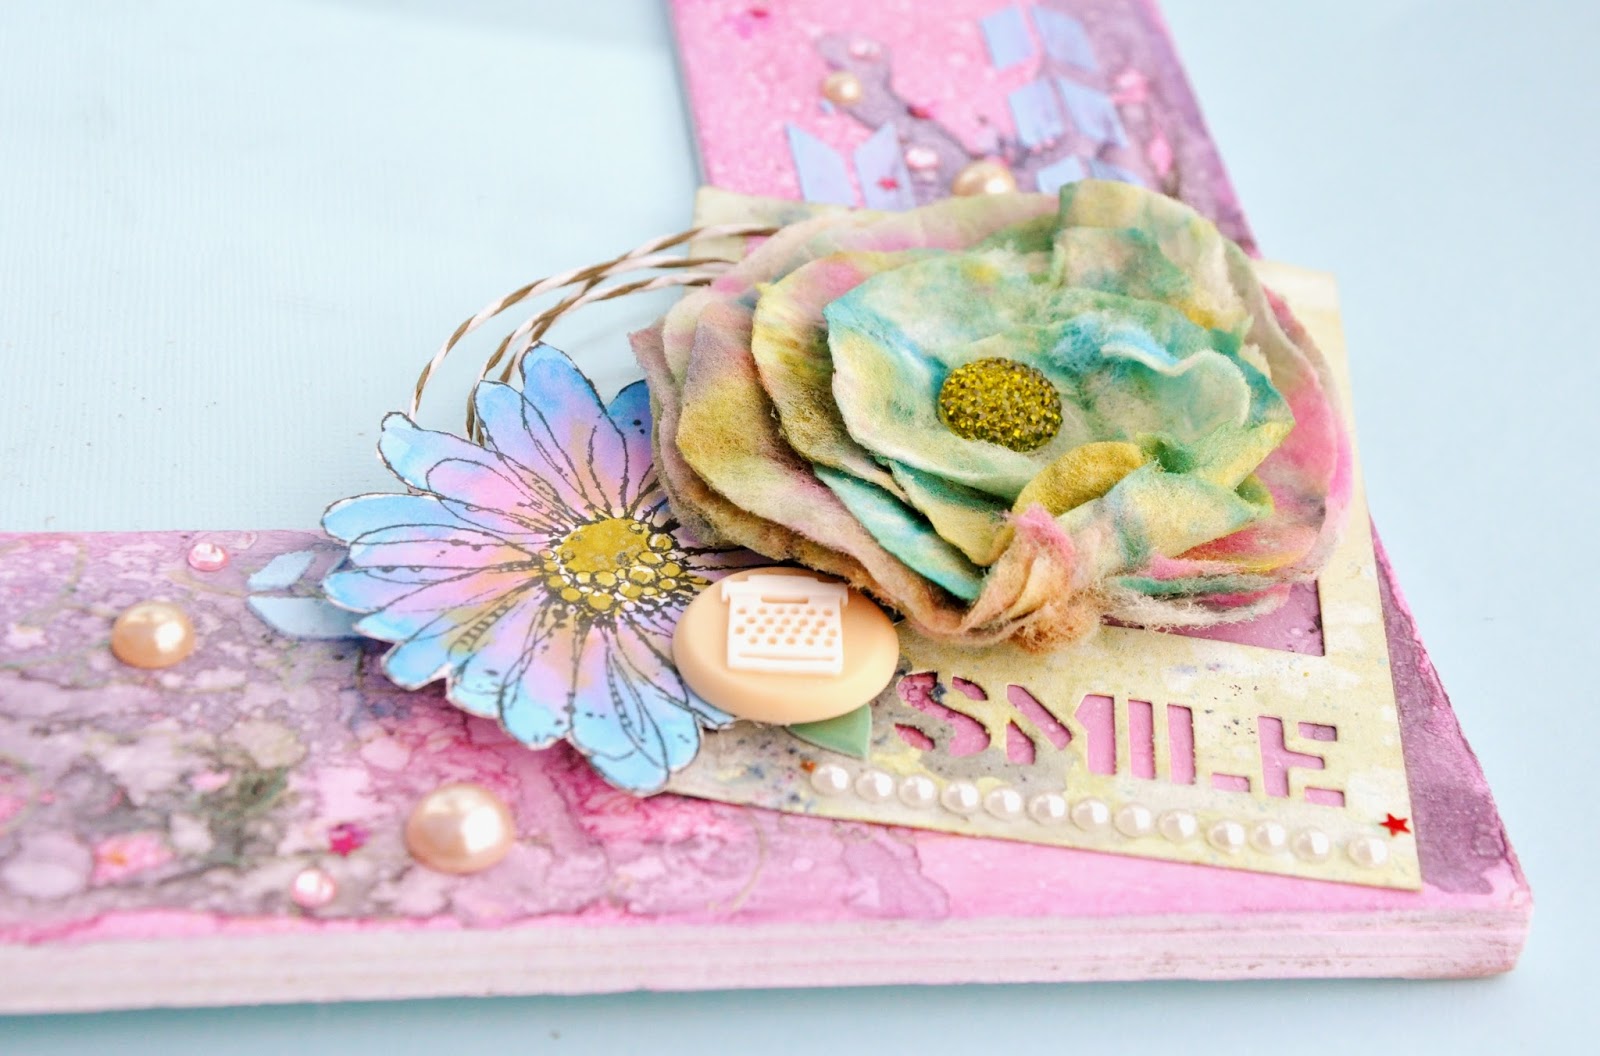
I used all 3 sprays, the Flat Fabio, and both Starburst sprays to water color these sweet flowers from Stampotique. I have been wanting to use this stamp for what feels like forever and this project was just the right thing. I ended up coloring 2 of them and really like how easily these sprays worked as watercolors. Additionally, I used some extra Hawaiian Blue texture paste on this vintage key. Gave it a more shabby look instead of a vintage look. The small flower here was created using a white paper flower and spraying it thoroughly with Starburst Spray in Rusty Lantern Lime. It is hard to tell, but that flower is so shimmery in the light!!
While researching Lindy's Stamp Gang I came across this really wonderful video showing how to create flowers from used baby wipes (used as in....painted and splattered, not used by babies). I knew I had to create a couple of these for this project. Using the sprays, of course. I used Rusty Lantern Lime and the Black Forest Magic Shaker on the paper frame.  
The end result is so wonderful! I will have to either gift this frame (this will be almost impossible) or, I will have to find the most wonderful photo. This frame is a statement piece all of it's own. It is difficult to see but the embossed script is on both top and bottom of the frame.
I really hope this inspires you to get messy and create something beautiful. Until this project I had no idea just how versatile all of the sprays and products really could be and I challenged myself to ONLY use the Lindy's products provided and was not at all disappointed. In fact, I was pleasantly surprised. So, thank you Lindy's Stamp Gang for teaming up with Stampotique. I see a new obsession in my future!

Ingredients:

Kassa's Blossom: Stampotique
Script Background: Stampotique
Flat Fabio Raspberry Lemonade: Lindy's Stamp Gang
Stardust Spray Hawaiian Blue: Lindy's Stamp Gang
Stardust Spray Rusty Lantern Lime: Lindy's Stamp Gang
Magical Sidewalk Chalk Lindy's Stamp Gang
Magical Shaker Black Forest Black Lindy's Stamp Gang
Embossing Powder: Dandelion Yellow Green: Lindy's Stamp Gang
Jolee's Boutique/EK Success White Paper Flowers
Arrows Stencil: Dina Wakely
White Paper Frame: Jilli Bean Soup
Bakers Twine: Tim Holtz
Adhesive Pearls
Adhesive Gems
Star Sequins
Texture Paste: Ranger

Saturday, March 11, 2017

Messy Evening

My friend Kristy and I haven't gotten together in WAY too long to craft so we did last night. We got SO messy...and it was wonderful. 

We played with spray inks as well as alcohol inks and Yupo paper. 

I actually pulled out some stamps that have been gathering dust for quite some time My Dina Wakely stamps were calling to me!!

I used Tattered Angels Glimmer Mist and created gorgeous paper and then stamped and water-colored Dina's stamp. I also used one of her sentiments. I got this set at Hobby Lobby on clearance. The font and the sentiments are wonderful.
As for the Yupo paper, I really love it and it is so neat how you can continue layering the colors. Kind of mesmerizing. I probably won't buy any more tho. I feel like I can't control the outcome as well as I would like. It IS pretty, though! Can't wait to find a good use for them! 


This post is short and sweet. Hope you enjoy the colors and all! Have a wonderful day!

Tuesday, November 1, 2016

ATC! Approach With Caution!

OKay, I am back! With more ATCs! Seriously, I never realized how therapeutic creating an ATC could be. When you don't have a lot of time but really have the itch to create, these little cards are just about perfect. 

I love this cactus stamp from Stampotique and had a lot of fun envisioning a sunset, desert sky for the background.

The background orange and pinks were created with dylusions sprays. Love how the colors gradated. The sunburst is a Tim Holtz stencil (rays) that I just love and use quite a bit, with Dina Wakely heavy body acrylic paint and I love how the paint just sticks in place and shows all of the details of the stencil.
 I colored the cactus with my copic markers. I am having fun getting reacquainted with them. I have been using watercolor pencils quite a bit and have really started missing my copics. I mixed the copics with a Prima marker, which, surprisingly I love almost as much as my copic markers. They blend very well!
Annnnd, of course, when around cacti in the desert PLEASE approach with caution. ;) 

Ingredients:

Prickly Pear Cactus (Stampotique)
Approach With Caution (Stampotique)
Tim Holtz Rays Stencil
Dina Wakely Acrylic Paint
Copic Markers
Ranger Black Archival Ink

Wednesday, October 5, 2016

SDC #258 Favorite Quote

When I was younger, I had a Tigger (yes, tigger) notebook that I used to write down every inspirational quote that meant something to me. I must still have it somewhere. Anyway, I kind of wish I still knew where it was. This week we are continuing our theme at Stampotique, which is, "favorite quote". Luckily, Stampotique has a lot of fun and inspirational quote stamps.

This one, "Color Her Soul" really spoke to me. It needed to be a wall hanging. It is a larger stamp so that worked out well. Moth Fab seemed like the perfect girl to be paired with this sentiment. 

And, of course, Moth Fab got the watercolor pencil treatment as well as a white paint pen to make her pop. Love using mixed colors on her. 

Its no secret that I have really gotten into mixed media over the last couple of years, and this is no exception. For this wall hanging I used Dina Wakely heavy bodied acrylic paint as well as some other acrylic paint. For the texture on the background I used Diane Revealy's "large triangle" stencil and Ranger texture paste. 
Loved how all of these elements came together to tell a story and back up the sentiment. Went a little heavy on the accessories, but I think they work. Even stiffened some bakers twine to create a fun detail behind the flowers.
Be sure to check out all of the other beautiful projects (see the DT on the left bar of this page) and then enter our challenge!!! 

Ingredients:

Stamp: Moth Fab
Dina Wakely Heavy Bodied Acrylic Paint
Prima Handmade Flowers
Ranger Texture Paste
Ranger Archival Ink
Watercolor Pencils
Bakers Twine
Sequins
Adhesive Pearls, Paper Studio
Tattered Angels Glimmer Mist, Chalkboard
Various Washi Tape

Tuesday, August 2, 2016

Back To School!

So, it happened. My baby boy is now a 4th grader. I really can't believe it. Its frightening. Time just keeps slipping away. On the positive side, I have time to catch up on chores and to craft, so, its a balance.
Today I was dragging. Seriously dragging. Getting up before 7 is for the birds. And for those who may scoff, I have reasons. K? Like, medication reasons. Anyway, in an effort to bring up the mood, I crafted. And with what else? A new stampotique stamp! Cause, not only am I obsessed, I am kind of on the team so I get to bring you delightful art in addition to my own art! 

Stampotique just had a release so, of course, I had to jump right on that and create something else. I created a bookmark. Love the style of these stamps and how they go with the style of Ms. Peregrine's Home For Peculiar Children. I decided to use Sargent and can see her maybe being Olive with her chunky boots. For coloring I used watercolor pencils. 

Because this is a bookmark, I made sure that it didn't have a lot of elements that could fall off or mess with the spine of a book, but I just HAD to add some texture. Texture paste to the rescue. Just enough to give the bookmark texture without breaking the spine or leaving an imprint in the pages. 
Really love how vibrant the colors are and how it just pops. The sentiment, from Cosmo Cricket, was kind of perfect. Esp if you have read the aforementioned book. Now that my son is in school, maybe I can sit and READ a book instead of listening to an audio book like normal...if I don't fall asleep. ;)


Ingredients:

Sargent, Stampotique
Cosmo Cricket Sentiment
Stencil Girl Circle Stencil
Dylusions Key Hole Stencil
Dina Wakely Acrylic Paint
Ranger Texture Paste
Master's Touch Gesso
Watercolor Pencils
Americana Acrylic Paint